Modern
technology has provided not only industry but also the do-it-yourselfer
with valuable aids to the application of paint, varnish and other
substances. Some would argue that they render the paintbrush obsolete.
The
electric airless spray guns of today are high-quality, reliable
precision tools that are, with proper care, trouble-free in operation
and have a wide range of applications.
In
this introduction to spraying we offer you a few guidelines on
the technique of using electric airless spray guns for a variety
of tasks.
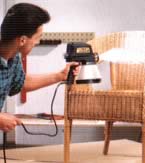
You
may be surprised what an effective assistant a spray gun can be
in jobs around the home, on metalwork, for car maintenance and
in the garden or smallholding. The examples mentioned represent
only a small selection from the many possibilities of saving time
and improving results, which are open to you with the aid of an
electric spray gun.
The
cleaner the surface the better the result.
Be
fanatical about cleanliness, in preparing surfaces for spraying.
Remember that every particle of dirt, every remnant of old paint,
every fibre rubbed off a rag makes a blemish in the subsequent
finish.
Before
spraying previously untreated wood or metal, first clean off all
traces of wax or grease, then roughen the surface all over with
fine glass paper or emery paper. Remove the resultant dust - with
a vacuum cleaner if possible.
A
tip from the professionals:
To
remove dust from wood, roll a fist size lump of putty all over
it. Putty picks up every last speck of dust from awkward places.
If
on the other hand the object to be sprayed has already been painted
once or several times before and good adhesion of the sprayed
surface cannot be guaranteed, there is no other choice than to
strip oft the old paint with a chemical stripper or burn it off
with a blowlamp. The more thorough a job you make of this, the
better will be the final result.
Partial
respraying is an art in itself.
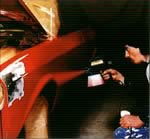
In
connection with car spraying, if only parts of the surface are
to be touched up, the areas to be sprayed must be bounded by grooves,
edges, joints etc. Never finish spraying in the middle of a panel.
No matter how well the new colour is matched to the old, the join
will always be visible; and if the colour match is less than perfect
the result will be reminiscent of wartime camouflage.
One
more hot tip from the professionals to protect parts that are
not to be sprayed.
If
it is difficult to mask off the part with tape etc, simply cover
it with grease. When the job is finished simply clean off the
grease together with the paint on top of it.
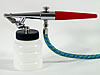
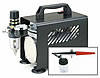
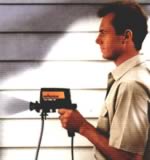
How
to prepare a WAGNER spray gun for use - and how you become the
star of the show.
By
now you have weighed up the pros and cons and decided to buy a
WAGNER spray gun. Now comes the great moment. All that is necessary
in the way of preparation has been done. You simply plug into
a handy power socket - and your spray gun is ready for use.
With
a bit of practice spray painting is child's play
When
using the gun for the first time you have to think about doing
things in the correct sequence. Soon this will become second nature
to you.
First Step:
Thoroughly clean the gun by loading it with solvent (preferably
the same thinner as you are adding to the paint) and spraying
this through. This ensures that the gun is clear and will not
give you any trouble during the job itself.
Second
Step:
Test viscosity of paint
Third
Step:
Fill gun container with paint.
Fourth
Step:
Screw container on to gun.
Fifth
Step:
Press the button. Test fineness of atomisation. To reduce volume
of spray turn volume control screw to the right: to increase volume,
turn it to the left.


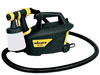

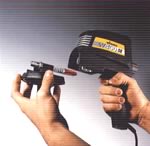
 The
gun above is drawing paint directly from the can.
The
gun above is drawing paint directly from the can.